Growing in Your Greenhouse: Flowering Bulbs
Spring is officially in session my friends! While things might not be in full bloom just yet, that doesn’t mean we can’t all get excited about the impending fields of flowers heading our way soon. For many, spring signals new life sprouting up from the ground, baby ducks crossing roads closely in line behind their mothers and wearing all too many pastel colors just because we can. This wonderful season is a triumphant return of natural color that isn’t white or earth toned! Not that winter doesn’t have a certain beauty all its own (I love to ski, you will never convince me that winter is bad), but there’s something about sunshine and flowers that just makes you happy. If you’re anything like me, you’ll end up buying fresh cut flowers almost weekly to bring some much needed color and fragrance into your home. But, what if I told you, growing your own flowers in your greenhouse is incredibly easy! Not only can you customize your greenhouse bouquet right down to color of the flowers you grow, but cutting flowers from your own greenhouse beds will save you the gas your weekly trip to buy flowers would cost you. I’m not saying that this is a means of avoiding the somewhat pricey and occasionally overcrowded flower festivals that occur during the spring time, but imagine your own personal flower festival that you can access daily. Plus, you won’t get kicked out of the place for cutting down some stems. Regardless of if you love lilies, prefer peacock flowers, or freak out about freesias this blog is for you. Join us as we explore the ins and outs of growing flowering bulbs in your greenhouse.
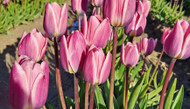
Now, some of you may be thinking, “If you start bulbs now, they won’t flower until May!” Well, you’re not wrong. But, as the old saying goes, April showers bring May flowers and here we are talking about them in March. So, in some respect, we’re still early. If you’re going along the timeline of the Skagit Valley Tulip Festival that runs the entire month of April, then in that respect yes, we are a bit late. But, chances are most outdoor flowers you’re going to see at these festivals, were started in a greenhouse. So you might not have an April full of flowers in your greenhouse, but if you start today, in 6-8 weeks you’ll have more flowers than you know what to do with. Let’s get started, shall we?
If you live in an area like Western Washington where the weather hasn’t quite caught up with the calendar, not to worry! Most bulbous plants actually love cooler conditions. These are a few of the plants that you won’t need active heat to grow early in the season. A second cost saving measure involved with growing flowering bulbs. But, before you actually get down to planting, some things to consider. Certain bulbs will grow better at different times of the year, even in your greenhouse. Due to the availability of sunlight and daytime high temperatures, the time you plant will impact what bulbs you should choose. For example, you can plant a tulip bulb in late March, but it probably won’t have as many flower spikes had you planted it in February.
- Later January through March, plant “Spring Bulbs”
- Mid-March through July, plant “Summer Bulbs”
- August through October, plant “Autumn Bulbs”
- Mid-October through January, plant “Winter Bulbs”
Spring Bulbs: Anemone, Daffodils, Freesia, Iris, Peacock Orchid, Tulips, Triplet Lilies.
Summer Bulbs: Canna Lilies, Dahlia, Elephant Ears, Gladiolus, Pineapple Lily, Tuberose and most other tropical bulbs.
Autumn Bulbs: Cyclamen, Dahlia, Dutch Iris, Elephant Ear, Gloxinia, Windflowers.
Winter Bulbs: Amaryllis, Crocosmia, Daffodils, Dutch Iris, Freesia, Hyacinth, Most Lilies, Paperwhites, Persian Buttercups, Windflowers.
*Note* When purchasing bulbs, look for ones that have three to five eyes and some initial root formation. This will ensure that you have as many flowers as possible from each bulb. In General when purchasing your bulbs, make sure they are firm and appear healthy. Soft bulbs will rot easier which means no flowers for you.
This list is very much incomplete, that I do not deny. However, these are generally speaking, the bulbs that you will find available at your local flower shops and garden supply stores. If you find some that are not on the list, more power to ya! I’d be happy to hear how they turn out!
*Note* Know what you want out of your flowers before you plant. If you want sustained flowers all season long, don’t plant all your bulbs at once! Stagger your planting so your bulbs mature at different times. This practice will ensure that once your first round of flowers starts to die off, a second is ready to replace it! If you want all of your flowers ready at the same time, plant them all at once! Doing so should result in all the flowers being ready at once so your bouquet will be bursting at the brim.
Most bulbs will come with instructions on planting. It’s pretty important to follow those instructions carefully because planting bulbs too close together will impede root growth and thus prevent your flowers from reaching their full glory. Err on the side of caution and leave ample space between your bulbs to maximize each one planted. However, be smart about it because leaving too much space can mean you’re not able to plant as many as possible while still generating optimal results. However, before you plant, let’s look at soil composition.
Most bulbs will do just fine in commercial grade soil that you can get at the store. If you wish to make your own, a mix of clay, sand, silt and various forms organic matter. Essentially try to mimic sandy loam style soil as best you can. The soil should have a neutral pH, be relatively loose so roots can permeate easily and be able to drain off water with ease. Place a top cover of compost, at least 2-3 inches, then dig your holes according to the specific bulb you are planting. Most bulbs should be planted about 5 inches deep in the soil, aside from begonias and dahlias which both are best planted just below the soil. Rule of thumb being to plant the bulbs half as deep as the flowers will be tall, this way they have enough counter weight and a deep enough root system to hold the plant upright.
Watering your bulbs should be a relatively easy process. Keep the soil around the bulb moist, but not soaked. Try to avoid getting water on the foliage to minimize fungal and mold growth. Adjust water needs to the season in which you’re growing. Summer bulbs will need more water than winter bulbs just based off sunlight intensity alone, heat is also a major factor. Bulbs in your greenhouse will appreciate a slightly humid environment, though don’t go too humid unless you’re growing tropical bulbs, in which case still keep an eye on moisture build up on your greenhouse walls and ceiling. Nothing leads to mold and mildew like wet walls in your greenhouse.
Are you ready for the third money saving venture involved with growing your own flowering bulbs? Once your bulbs are finished flowering, they can be dug up and stored in a cool, dry area to be replanted next year! Once the foliage has begun to die back, remove the foliage to dirt height, then safely dig up the bulb, trying to maintain the root system as much as possible. Separate the bulbs into individual pieces, each maintaining some amount of the root system. Throw away any bulbs that are showing signs of rot. Clean the dirt from your bulbs and leave out in the open air to dry. Depending on the bulb this process can range from days to weeks. Once fully dry place them in a breathable bag such as burlap or a brown paper bag along with some natural packing material like sawdust or peat moss. Keep the bag in a dark place such as a cabinet at a temperature range of 50° - 60° F (10° - 16° C). This temperature will ensure the bulbs stay in a dormant state, meaning they will not begin to re-grow in the bag. Check on them weekly and remove any rotten bulbs from the bunch to avoid the problem from spreading. Once you’re ready to plant them again, go right ahead, same rules as before.
Bulbs are a lot of fun to grow because they give you a lot of creative freedom. If you have a large plot, you can arrange them in a fun design or according to color. Within reason, you have some free reign if you are planting in a large bed. If you are planting in pots or smaller beds, which is probably more likely, you still have the freedom to do what you want, it just may be a bit more restricted. Unless you’re creative enough to make a cool looking pattern of flowers that includes the pots they’re in. It’s all up to you! Bulbs are also, generally speaking, easier to grow than something you start from a seed. Bulbs are relatively hearty so they tend to be a bit more self-sufficient. That doesn’t mean you can ignore them, but you probably won’t be checking in on them every day like you might a seedling. There’s a reason we don’t sell bulb starting kits like we do for seedlings.
Bulbs are a great way to start gardening or just a way to make sure you have flowers around the house. Side note, daffodils are some of the only flowering bulbs that deer tend to leave alone. My grandma taught me that one when I was but a child. Until next week, thanks again for reading!


